Power Tail Trimmer Attachment
I trimmed 250 tails in 45 minutes.
Ryan Bailey
New Zealand
The Ultimate Tail Trimming Aid
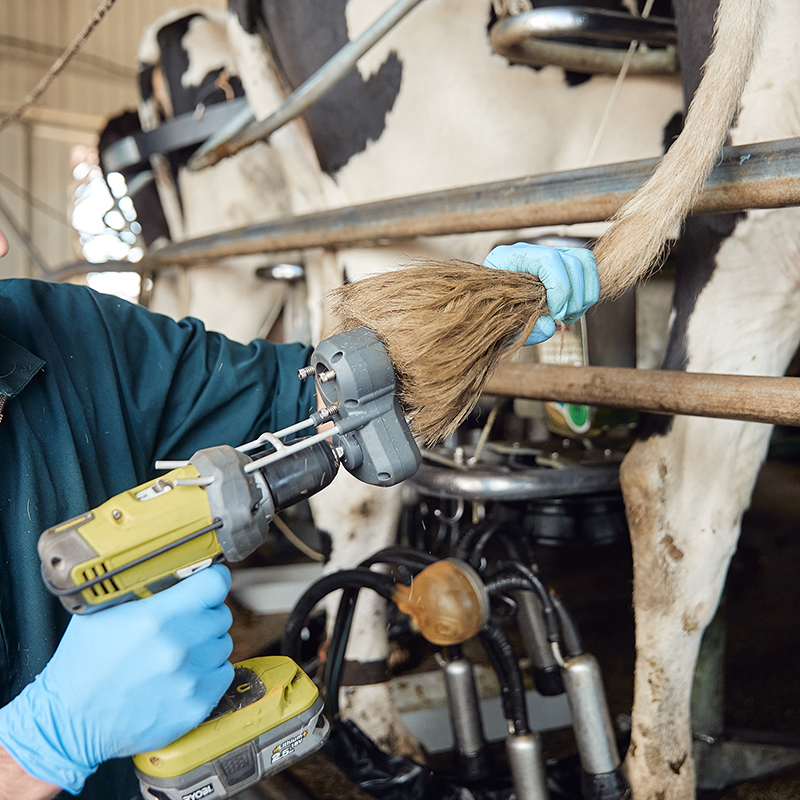
Tailwell is quick and easy to use, and can effortlessly trim a single tail within ten seconds. Herd tail trimming can be carried out during one regular milking.
The trimmer will fit most power drills, but the best choice is a fairly lightweight 18-volt drill operating at 1200 to 1800rpm. Tailwell has only three moving parts so needs very little maintenance. All steel components are of a high quality stainless steel, so long life is assured.

TITANIUM cutters model available
Fast, easy-to-use and perfect results – Less than 10 SECONDS per tail!
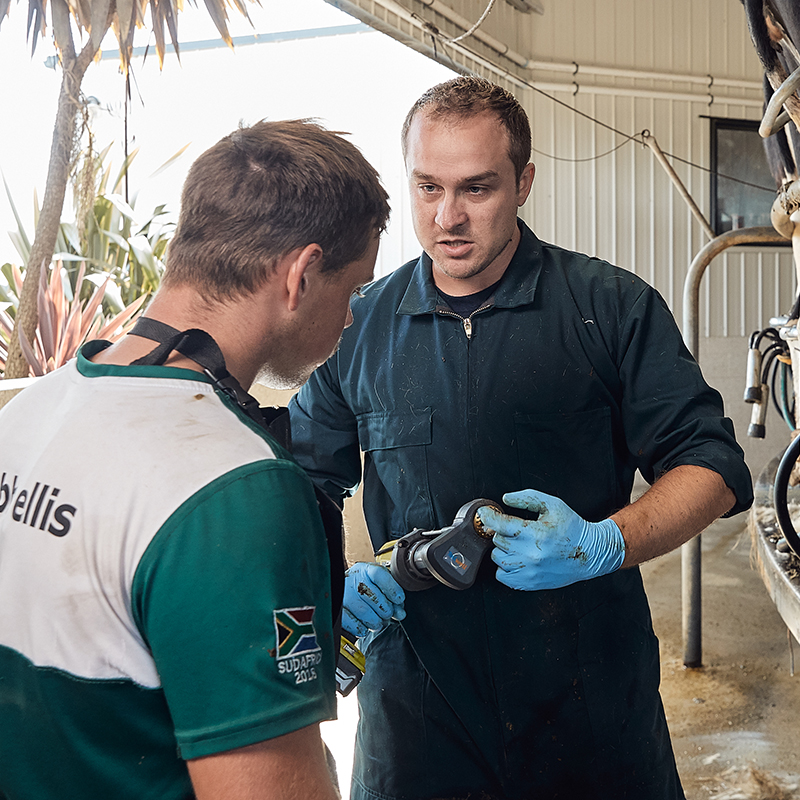
The quick and easy solution to trimming tails.
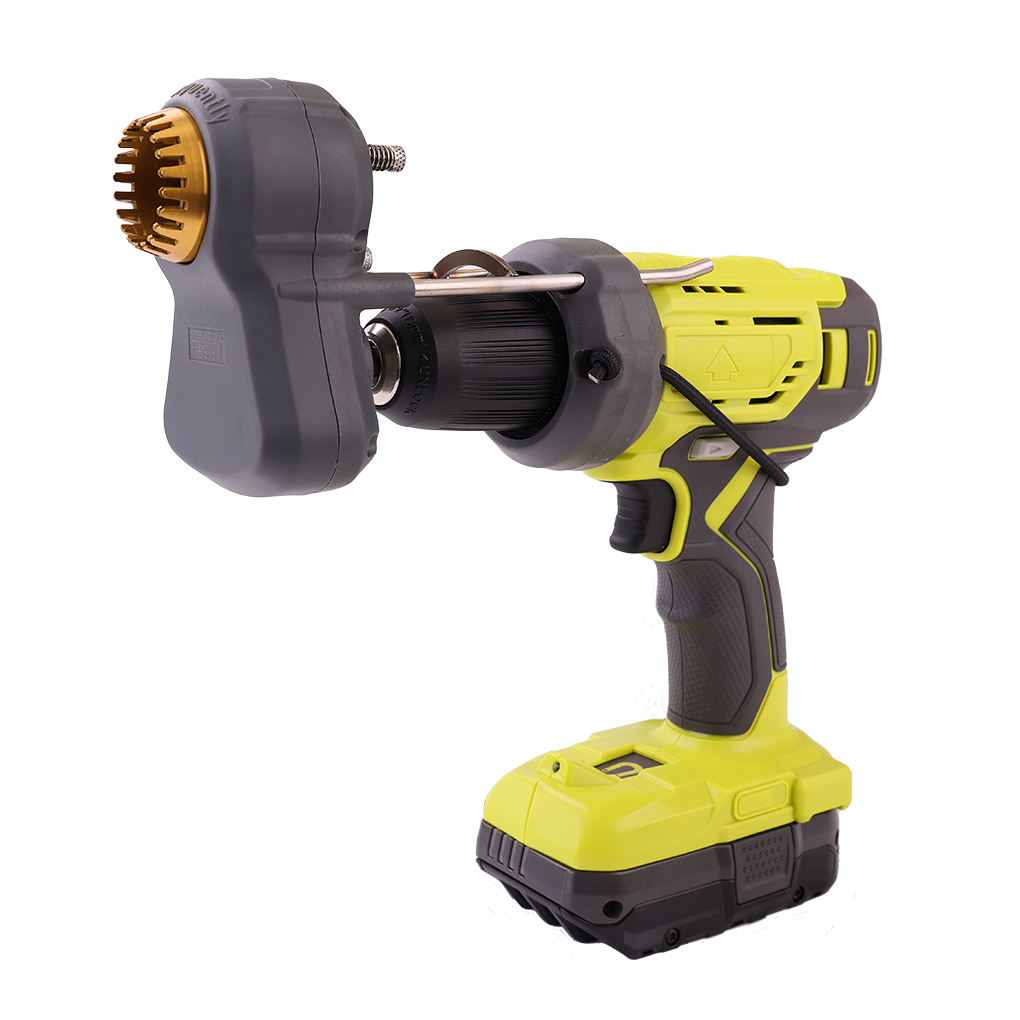
Developed in New Zealand for dairy farmers, the Tailwell Power Tail Trimmer speeds up and relieves the tedious job of trimming dairy cows tails.
Keep your dairy cows and staff clean, healthy and happy. Keep your cows’ tails trimmed and clean by twice-yearly use of Tailwell. Only seconds per cow. Can be done during regular milking. You will be amazed at the difference in your herd’s appearance and health when all tails are trimmed and clean.
Tailwell Power Tail Trimmer
Trimming dairy cows tails reduces faecal and urine contamination of milk in the vat, improves cleanliness and health of the cow, and improves hygiene and health of milking staff.
The recommended twice yearly tail trimming ensures staff stay safe and milk maintains its highest quality.
- A drive shaft secures the Tailwell power tail trimmer into any suitable cordless drill of 18 volts, operating at 1,200 rpm to 1,800 rpm
- Tailwell is quiet in use, with a smooth, fast cutting action
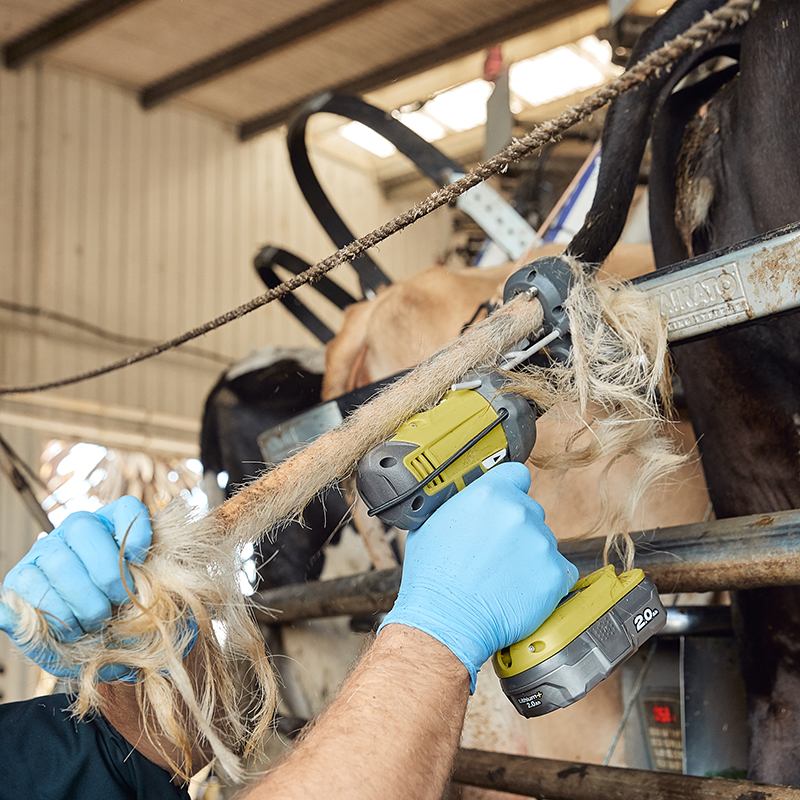
- Trim tails within a few seconds during milking or in the barn
- An outer blade oscillates over a stationary inner blade, this prevents any risk or injury to the cow
- Pre-cutting the tail’s switch is not necessary. Dirty tail-ends feed smoothly over the trimmer
- This is a sturdy precision tool that will withstand considerable use. The handy neck strap allows for hands-free operating between cows. Replacement cutter sets are available.
To prevent trimmings from blocking parlour drainage, a trimming collection apron is available as an accessory.

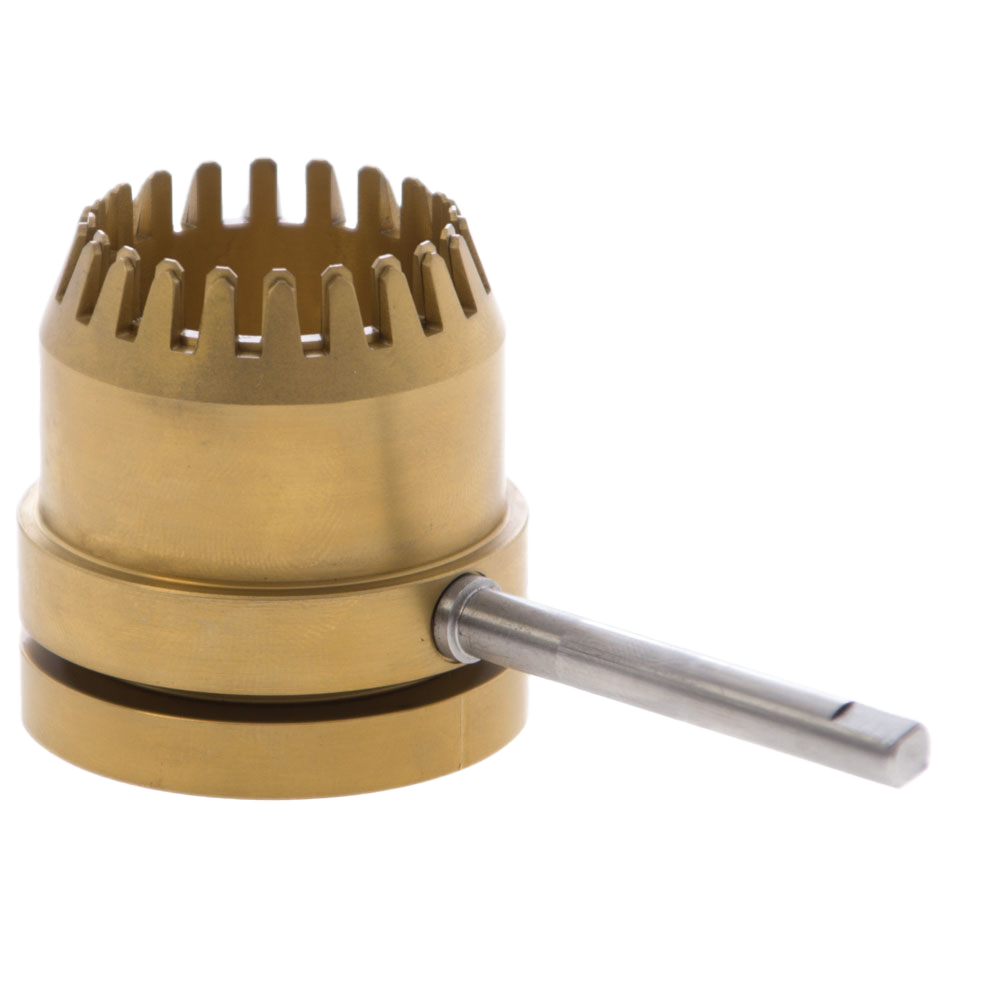
Titanium Cutters
The Tailwell TITANIUM maintains a longer cutter life compared to the original Tailwell Power Tail Trimmer, especially when dealing with sand contaminated tails or where cows were bedded on sand. User experience shows the titanium coated cutters lasting up to 3,000 sand embedded tails (or 6,000 non-seriously contaminated tails).
Fitting the Tailwell to a cordless drill
- Place the Tailwell drive shaft into the open chuck and pull the flexible sleeve backwards, firmly onto the drill
- Tighten the drill chuck, making sure that the chuck claws are aligned with the flats of the Tailwell driveshaft
- Pull the flexible sleeve back on the drill once more to ensure that it is tight
- Pull the stretchy cord over the back of the drill. This is for safety against the Tailwell dropping off the drill accidentally
- Oil the cutters with the oil supplied in the kit
- The Tailwell is now ready to trim
How to achieve the perfect trimming result
You will achieve the best trimming results if you make two passes over the tail.
This video explains the trimming technique required for the optimum outcome.
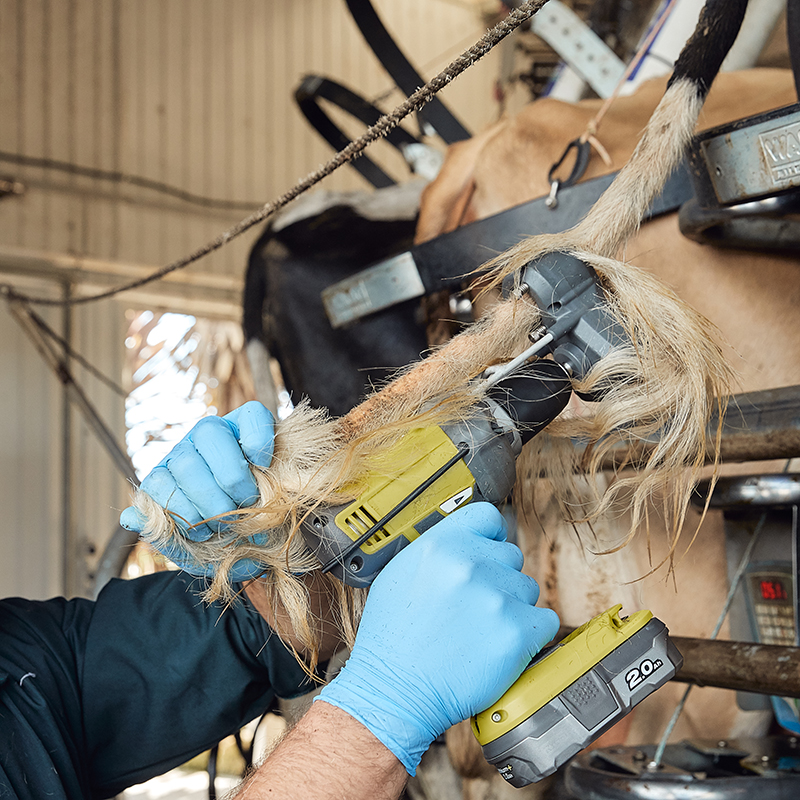
How to cut dag-filled, long and wet tails
No matter what condition the tails are in Tailwell can cope easily.
This video shows how Tailwell can be used with long-haired, wet or dag-filled tails.
Require more information?
Please visit the Maintenance section below for more information about maintaining your Tailwell. Alternatively, you can contact the manufacturer if you have any further questions.
Operating Instructions
English, Deutsch and Espanol.
Troubleshooting Guide
Click on the problem you are having from the options below for a guide on how to fix it.
Tailwell Maintenance
In order to achieve the very best results from your Tailwell, there are a few important steps to follow for ongoing maintenance.
How to adjust the tension screws
Although the Tailwell should leave the factory pre-set, the cutter tension should be checked before first use. It is very important that this is set correctly to prevent any hair getting between the inner and outer cutters. Follow this procedure carefully. WATCH THE ONLINE INSTRUCTION VIDEO
Using the tool even once with badly adjusted cutters can cause hair to get between the cutters and prevent proper performance of the tool.
- Line the cutter teeth up behind each other so you can see a gap between the two rows of cutters.
- Tighten the tension screws evenly to hand tight, then back off about an 1/8 to 1/4 turn.
- The Tailwell cutters should just be able to be turned freely by finger grip only. Not too freely and nor too tightly.
IMPORTANT NOTE: If hair is caught between the Talwell cutters, cutting performane will be severely impaired. The cutter tension must be perfectly adjusted to prevent this.
Maintenance during trimming
Every 30-50 tails, to ensure continued good performance, undertake some quick maintenance.
- Look for any debris caught in the cutters (hair etc). If apparent, the cutters will need to be removed, cleaned and reassembled, then re-tensioned. (See section on Sharpening the cutters).
- Check and if necessary, reset the cutter tension screws.
- Line the cutter teeth up behind each other so you can see the gap between the two rows of cutters.
- Tighten the three tension screws evenly to hand tight, then back off about an 1/8 to ¼ turn.
- Oil the cutters thoroughly using the Tailwell oil supplied.
How to sharpen Tailwell cutters
The Tailwell cutter will require sharpening from time to time. Follow the procedure below as well as watching the video on this subject.
- Remove the cutters from the Tailwell casing.
- Separate the inner and outer cutters.
- Clean all parts thoroughly with a clean cloth.
- Apply a thin coat of lapping paste (included in the Tailwell kit) to the outer face of the inner cutter.
- Use your finger to smooth out the paste evenly around the cutter.
- Place the two cutters together and rotate against each other for one or two minutes, until a smooth cutting action is felt.
- You should see an even and complete grinding surface on the inner cutter, which means the cutters are now sharp. If not, reapply paste and continue to rotate.
- Clean all remaining lapping paste from the cutters. This is important.
- Apply Tailwell oil to the cutters and reassemble the Tailwell machine.
- Re-adjust the cutter tension screws.
Servicing the Tailwell unit
You should service your Tailwell unit each time you have completed trimming, and before you store it away. Follow the steps below and if possible, watch the video for additional help. Your storage case contains all the necessary tools and information required
Preparing the Tailwell for servicing
- After taking the Tailwell off the drill, back-off the adjustor screws one complete turn to release the tension. (This is important, even if nothing further is done.)
- Using the hex screwdriver supplied in your Tailwell kit, remove the six screws holding the case together.
- Once the case screws are fully undone, place the cutter teeth face down onto a clean rag and press firmly. This will separate the two cases. Inside you will see the Tailwell drive mechanism.
- Remove the cutters from the front case and separate inner and outer cutters.
- Remove the blue plastic rotator bearing.
Servicing the Tailwell
- Thoroughly clean the cutters thoroughly of any build-up of grime and hair off the cuters.
- Once cutters are clean, re-lubricate them with Tailwell oil. Apply a thin film around the cutter edge, place cutters back together and rotate to distribute the oil.
- Check the sliding rotator bearing closely. If there is any sign of wear, replace it.
- Place the cutters down on the ends of the three tenson screws while fitting the rotator bearing over the driveshaft.
- Test your drive shaft, checking that the outer cutter oscillates side to side.
- Apply a small amount of lubricant on the rotator shaft and the bearing surfaces
Re-assembling the Taiwell
- Replace the front of the case.
- Re-assemble the casing, tightening the six screws in a diagonal pattern to ensure even pressure. Tighten only hand tight. Overtightening may damage or misalign the case.
- Line the cutter teeth up behind each other so you can see the gap between the two rows of cutters.
- Tighten the three tension screws evenly to hand tight and then back off about an 1/8 to 1/4 turn.
- Oil the cutters thoroughly using the Tailwell oil.
- The Tailwell drive shaft should just be able to be turned freely by finger grip, not too tight or loose.
Tailwell TITANIUM
The Tailwell TITANIUM heavy duty tail trimmer features a longer cutter life – suitable for tails heavily contaminated with sand.
Features a titanium-nitrade (TiN) coating for the cutter set, this super-hard coating prevents early wear and tear that sand causes on the cutters. Titanium-coated cutter sets have a unique gold colour.
Benefits of Tailwell TITANIUM include:
- Good cutter life in situations of sand contaminated tails
- A super-hard coating prevents the early wear and tear that the sand causes, therefore extending the life of the cutters
- Trim tails within seconds during milking or in the barn
- Cutters will last up to 3,000 sand-embedded tails (or about 6,000 non-seriously contaminated tails)
- A reduced cutting power demand extends the life of the drill battery and results in reduced user fatigue


Titanium Cutters
Please Note: The titanium cutters cannot be sharpened, and thus the usual honing paste is not included in the Titanium heavy duty tail trimmer set.
TITANIUM is a higher-cost optimal product to our standard Tailwell. Titanium-coated cutters are available as an individual part fitting the standard Tailwell unit.
It must be noted that as with our regular model Tailwell – cutter tension must be checked regularly, and lubrication used regularly. All other regular Tailwell instructions for use and service instructions apply.
Intellectual Property
New Zealand
NZ Patent No. 605036
NZ Design Registration No. 415178
NZ Design Registration No. 415180
NZ Design Registration No. 415521
China
Patent No. ZL201280063374.7 (专利号: ZL201280063374.7)
Europe
European Patent No. 2806734
Registered Community Design (RCD) No. 001311435-0001
Registered Community Design (RCD) No. 001311435-0002
Registered Community Design (RCD) No. 001325351-0001
United Kingdom
Registered Design No. 90013114350001
Registered Design No. 90013114350002
Registered Design No. 90013253510001
